Mark sold, To ship and shipping labels
Mark an item sold
When something sells, record it in Poof! so it leaves your to-do lists and shows as sold.
- On the item page, press Mark sold….
- Choose where it sold under Sold on. Poof! suggests that marketplace's saved price; check it and tick I confirm the final sold price, or leave the price blank if you don't know it.
- Check the Sold date (today by default).
- Under Delivery, choose By mail or In person / pickup. With By mail, Shipping starts at To ship; you can add a Ship by date if the marketplace gave you one.
- Optionally add How the buyer paid, fees and what you paid for the item.
- Press Mark sold.
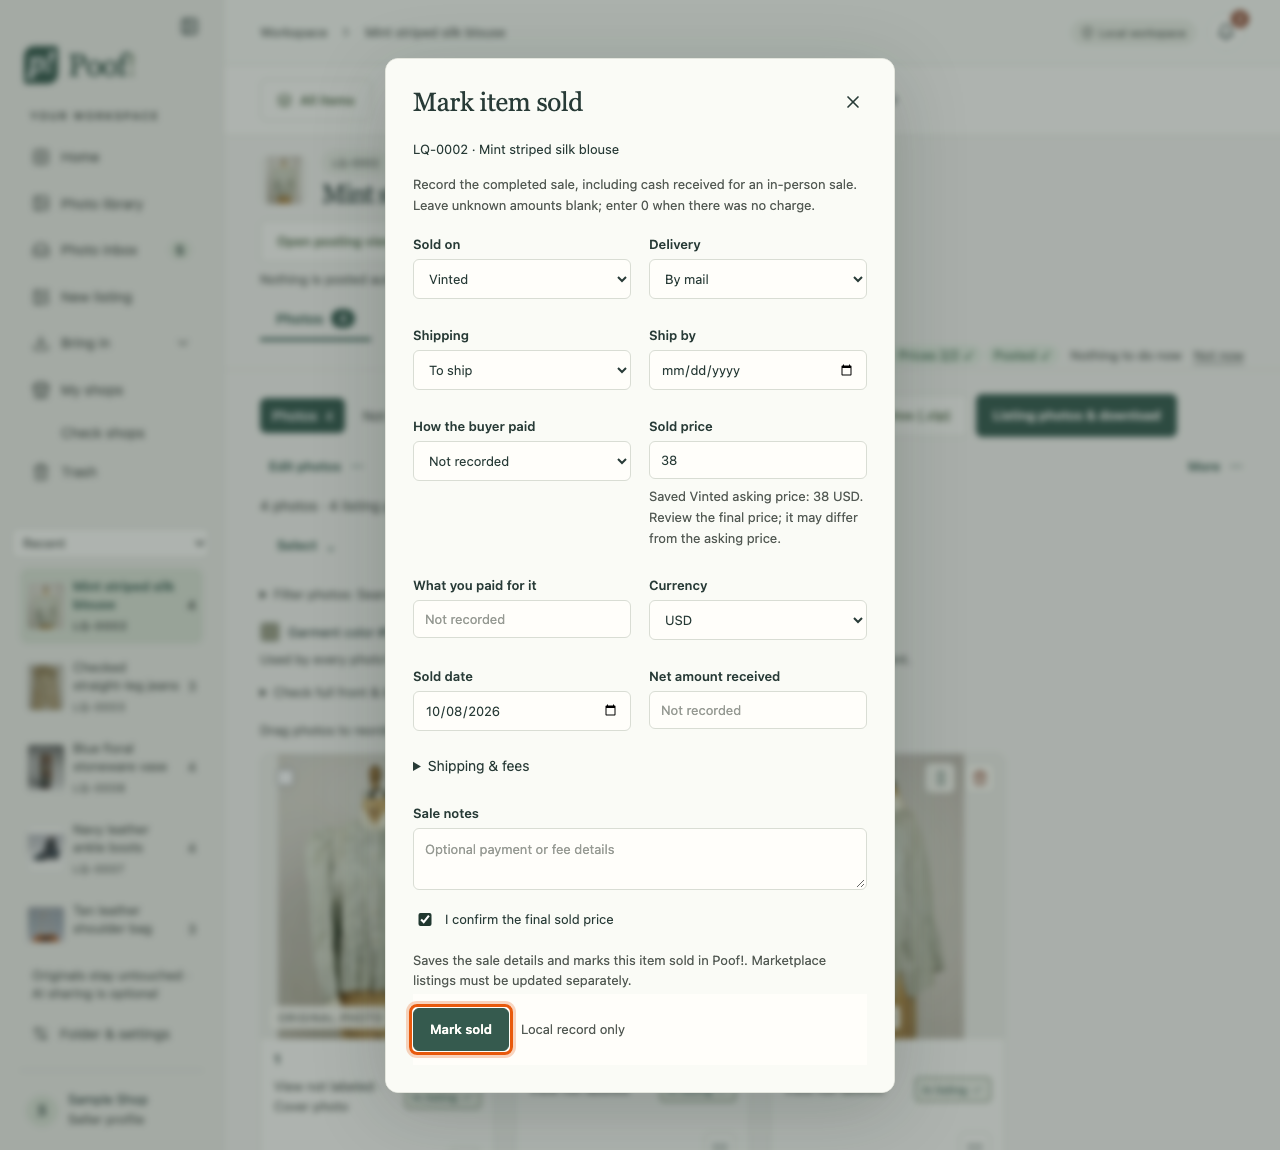
Poof! records the sale only on your computer. It does not take the listing down on any marketplace; do that yourself on each marketplace. On the sold item's page, Sold — check your other listings helps you see which other listings still need taking down. It reads their public pages and asks you to confirm each one; nothing is removed automatically.
A sold item's page leads with the sale. Sale details corrects the sale record later. Undo sale makes the item available again in Poof! and keeps the sale history.
Selling elsewhere
Poof! never marks an item sold by itself. Even when a listing reads as sold, Poof! only asks you; the sale is recorded when you confirm the sale form.
To ship
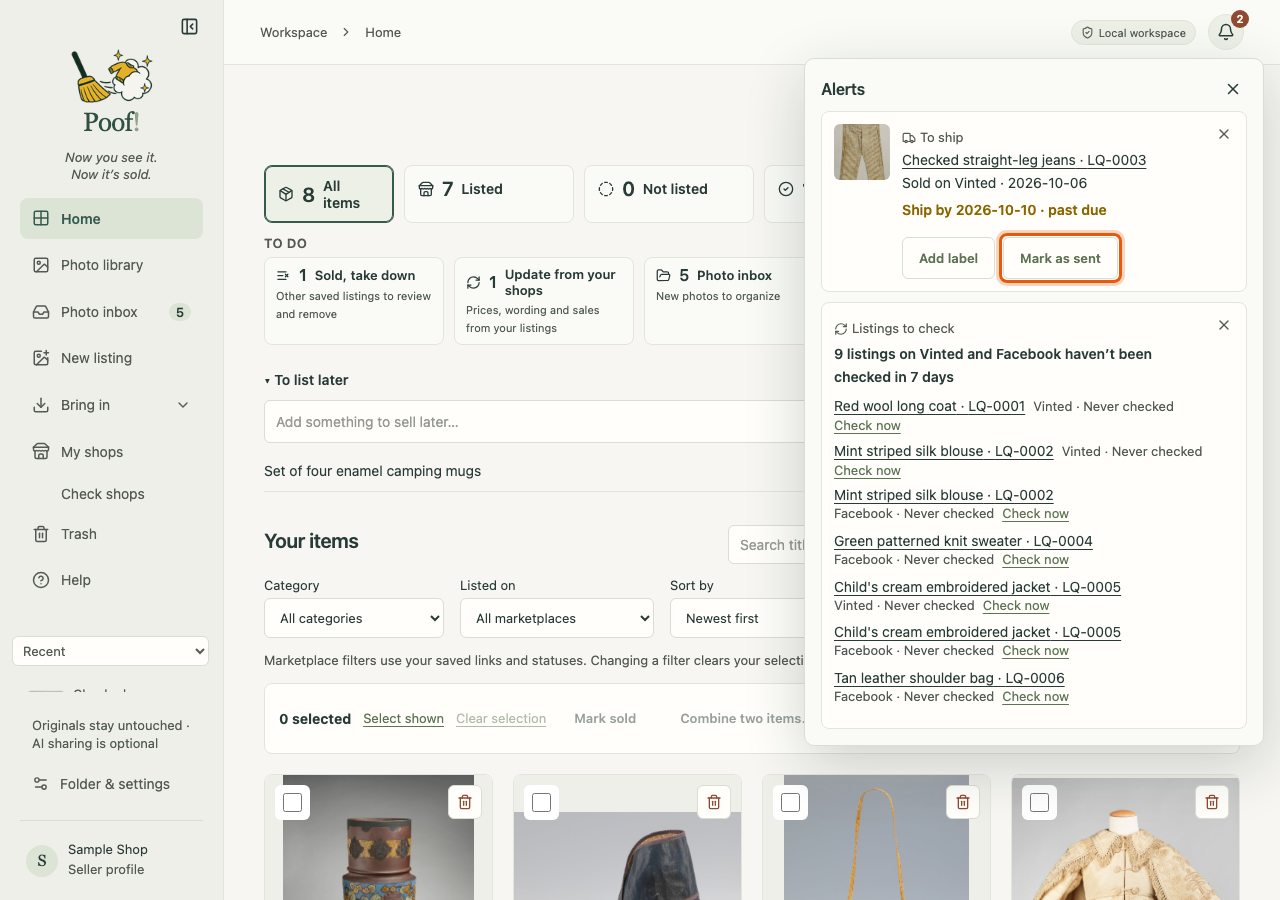
An item appears in To ship only when you record a sale with delivery By mail and Shipping set to To ship. To ship lives in the alerts bell at the top right. Each entry shows the item, where and when it sold, and your ship-by date.
When you have sent the parcel, press Mark as sent. Poof! records the date and the item leaves the list. Marking as sent changes nothing on any marketplace.
Shipping labels
Keep a sold item's shipping label in Poof! and print it on 4×6-inch label paper.
- On the sold item, press Shipping labels (or Add label in the bell's To ship entry).
- Choose the Label marketplace and press Add shipping label PDF. The file must be a PDF smaller than 10 MB.
- Press Resize to 4×6…, then choose the label area:
- Fit label · remove blank margins trims empty margins and fits the whole label;
- Fit whole page keeps the full page;
- Select label on page lets you drag a box around the label, including its barcode.
- Use Rotate label if needed, then press Create 4×6 copy.
- Check the preview, then press Open & print 4×6. In the print window, choose 4×6 paper, 100% / Actual size, and single-sided.
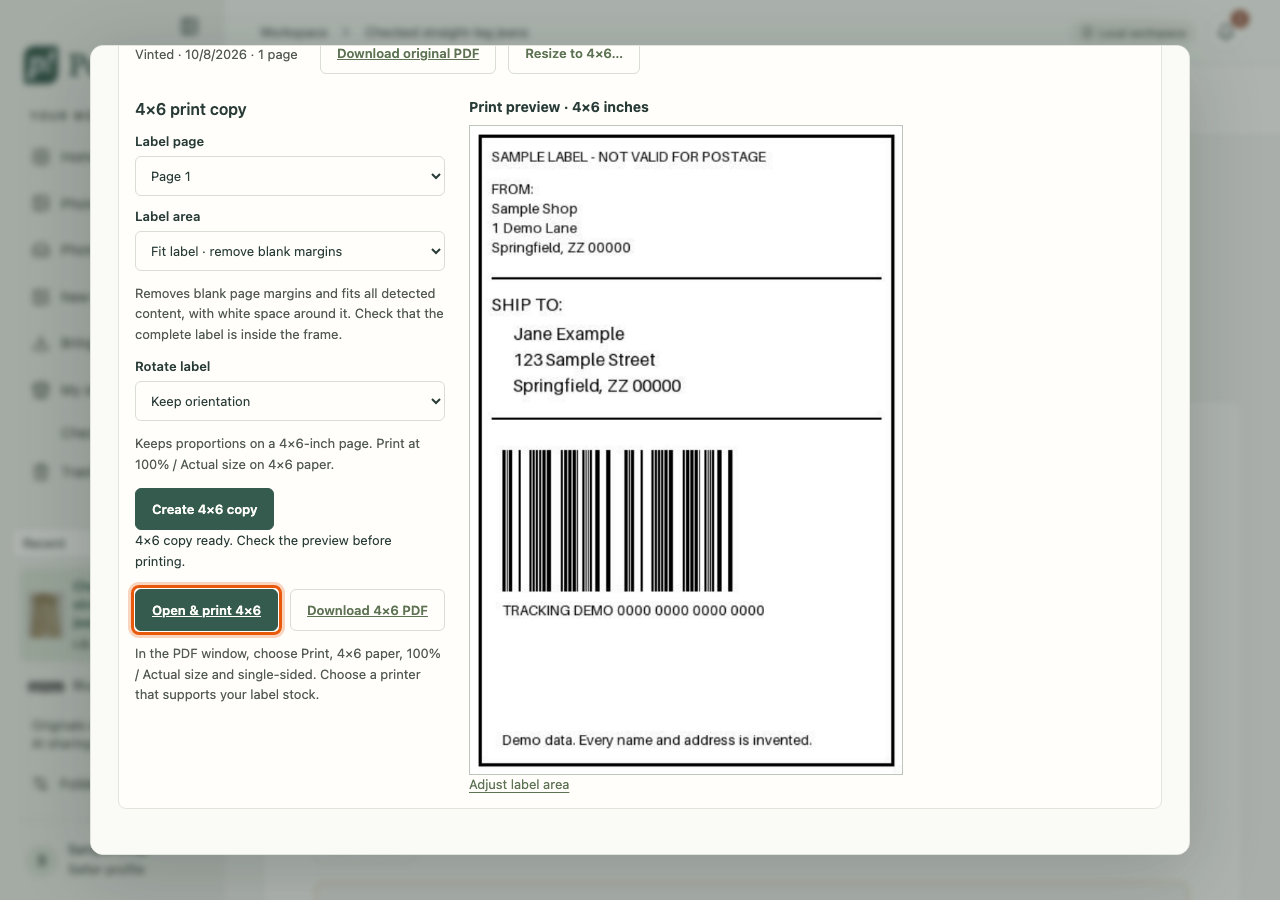
Download original PDF and Download 4×6 PDF save the files instead. Poof! keeps your original label unchanged and makes the 4×6 copy separately.
Labels stay on this computer. They contain addresses, so Poof! never sends them to AI and never puts them among your photos. Adding a label does not mark an item sold.